Before we start
If you hit this page without following the Step-by-step into Micro-Services Architecture with Spring and Netflix OSS, it can be useful to know about the serie:
- Part 1: The purpose of the series – MSA Step by step
- Part 2: Config-Server and Discovery Service
- Part 3: Edge Server: Netflix Zuul
- Part 4.1: Core Business – Card Service
Part 4.2
Statement Service
We broadly did it until now, so that, the steps are summarized here to save your reading time.
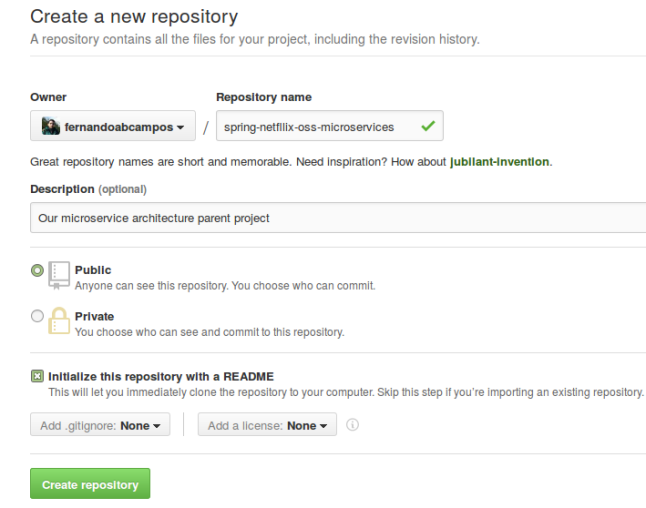
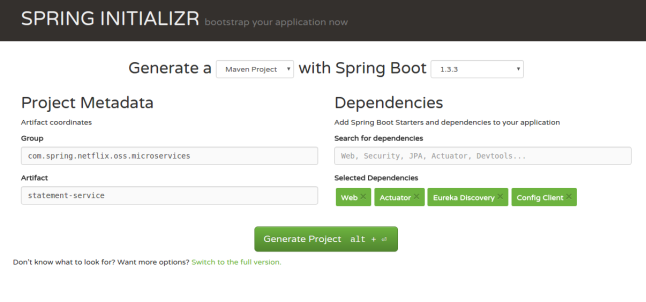
Create a new project:
Generate a: Maven Project
Spring Boot: 1.3.3
Group: com.spring.netflix.oss.microservices
Artifact: statement-service
Dependencies:
Actuator, Web, Config Client, Eureka Discovery
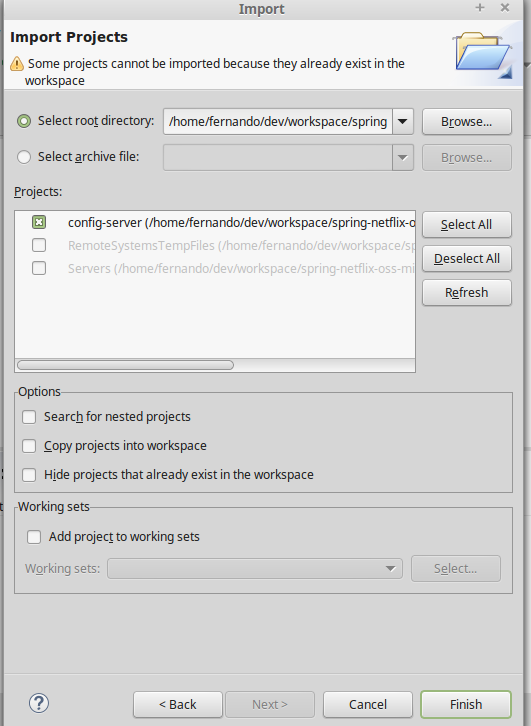
After this, import into your IDE.
Edit the class StatementServiceApplication adding @EnableEurekaClient.
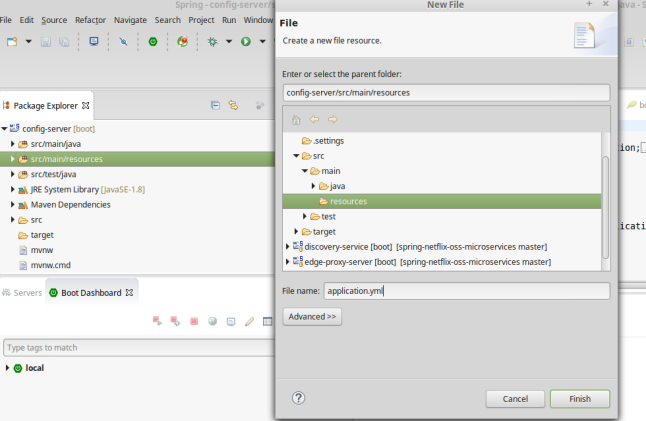
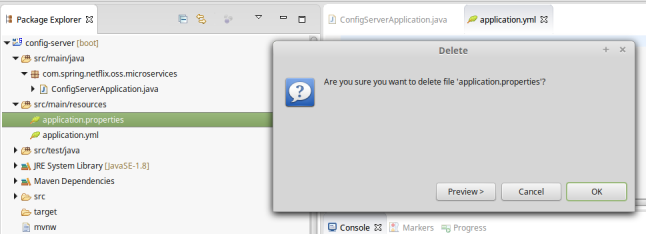
Remove the file application.properties from src/main/resources and add a new file under the same path, called: bootstrap.yml. Here its content:
spring:
  application:
    name: statement-service
  cloud:
    config:
       uri: http://localhost:9090
Create a package called: model under com.spring.netflix.oss.microservices.
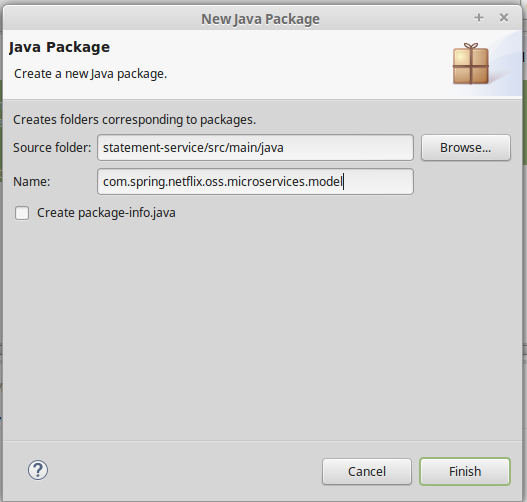
There, create a class named Statement:
package com.spring.netflix.oss.microservices.model;

import com.fasterxml.jackson.annotation.JsonIgnoreProperties;

@JsonIgnoreProperties(ignoreUnknown=true)
public class Statement {
	private Long id;
	private Long cardId;
	private String operationDate;
	private String value;

	public Statement() {
		super();
	}

	public Statement(Long id, Long cardId, String operationDate, String value) {
		super();
		this.id = id;
		this.cardId = cardId;
		this.operationDate = operationDate;
		this.value = value;
	}

	public Long getCardId() {
		return cardId;
	}

	public void setCardId(Long cardId) {
		this.cardId = cardId;
	}

	public String getOperationDate() {
		return operationDate;
	}

	public void setOperationDate(String operationDate) {
		this.operationDate = operationDate;
	}

	public Long getId() {
		return id;
	}

	public void setId(Long id) {
		this.id = id;
	}

	public String getValue() {
		return value;
	}

	public void setValue(String value) {
		this.value = value;
	}

	@Override
	public String toString() {
		return "Statement [id=" + id + ", cardId=" + cardId + ", operationDate=" + operationDate + ", value=" + value
				+ "]";
	}

}
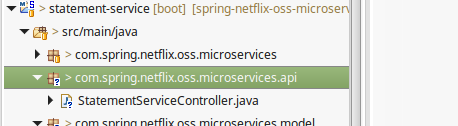
The same step as we did for card-service – let’s expose an API. One more package, api, also under com.spring.netflix.oss.microservices.
In this package, also create a class named: StatementServiceController.
The code for this comes here:
package com.spring.netflix.oss.microservices.api;

import java.util.ArrayList;
import java.util.List;
import java.util.Optional;
import java.util.stream.Collectors;

import javax.annotation.PostConstruct;

import org.springframework.web.bind.annotation.PathVariable;
import org.springframework.web.bind.annotation.RequestMapping;
import org.springframework.web.bind.annotation.RequestMethod;
import org.springframework.web.bind.annotation.RequestParam;
import org.springframework.web.bind.annotation.RestController;

import com.spring.netflix.oss.microservices.model.Statement;

@RestController
@RequestMapping(value="/api")
public class StatementServiceController {

	private List<Statement> fakeRepo;

	@PostConstruct
	public void init(){
		this.fakeRepo = new ArrayList<>();
		fakeRepo.add(new Statement(1l, 2l,"01/11/15 08:41", "US$411.05"));
		fakeRepo.add(new Statement(2l, 1l,"13/04/13 20:16", "US$1,914.00"));
		fakeRepo.add(new Statement(3l, 3l,"31/12/15 18:00", "€12.10"));
		fakeRepo.add(new Statement(4l, 4l,"21/11/10 19:55", "US$1.50"));
		fakeRepo.add(new Statement(5l, 4l,"10/06/14 09:37", "US$116.00"));
		fakeRepo.add(new Statement(6l, 5l,"14/01/12 14:49", "R$11.02"));
		fakeRepo.add(new Statement(7l, 7l,"15/12/20 12:00", "US$14.60"));
		fakeRepo.add(new Statement(9l, 6l,"01/11/09 13:02", "€1,888.93"));
		fakeRepo.add(new Statement(10l, 6l,"01/11/20 08:41", "€293.30"));
		fakeRepo.add(new Statement(11l, 6l,"01/11/20 08:41", "€11.68"));
	}


	@RequestMapping(value="/statements", method = RequestMethod.GET)
	public List<Statement> getStatements() {
		return fakeRepo;
	}

	@RequestMapping(value="/statement/{statementId}", method = RequestMethod.GET)
	public Statement getStatament(@PathVariable Long statementId) {
		return Optional.ofNullable(
				fakeRepo
				.stream()
				.filter((statement) -> statement.getId().equals(statementId))
                .reduce(null, (u, v) -> {
                    if (u != null && v != null)
                        throw new IllegalStateException("More than one StatementId found");
                    else return u == null ? v : u;
                })).get();

	}

	@RequestMapping(value="/statement", method = RequestMethod.GET)
	public List<Statement> getStatements(@RequestParam Long cardId){
		if(cardId!=null){
			return fakeRepo
					.stream()
					.filter((statement) -> statement.getCardId().equals(cardId))
					.collect(Collectors.toList());
		}
		return null;
	}

}
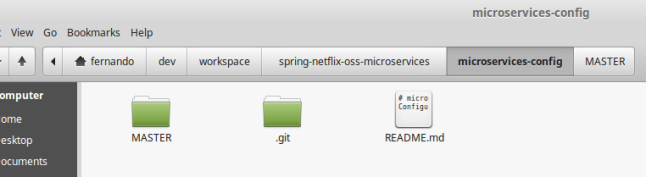
Navigate until our config folder path, i.e. ~/dev/workspace/spring-netflix-oss-microservices/microservices-config/MASTER and create a new file called statement-service.yml. Its he code:
server:
  port: 0

eureka:
  client:
    serviceUrl:
      defaultZone: http://localhost:8761/eureka/
Commit and push to our configuration project.
If you are following the series from the beginning, you might be thinking: “Why did we set up the server.port on that way (with zero)?“
The answer for this question is pretty simple – until now, even for test what we’ve created, we are always calling in specific server / ports, in spite of that, it is NOT the smartest way to deal with this kind of architecture.
Being honest, in fact our project until now is kind of useless for our main purpose. From now, we’re starting to use some features that we have enabled but are currently underused. For the sake of this abstraction of ports that we want to achieve, we need to change some configurations that we did in a previous part of the series.
Edit the config file card-service.yml and also set the port to 0 (zero). Later, open a class called EdgeServerApplication.java and we’ll change an annotation @EnableZuulServer for @EnableZuulProxy. With this, we’re asking to our Edge-Server to act as a reverse proxy – some step ahead we’ll set up the routes for this.
Excellent! Now we have one more service ready.
Part 4.3
Card Statement Composite
When you read the term Composite, you must be probably thinking in the litteracy meaning of this word. According to thefreedictionary.com:
a. Made up of distinct components; compound.
If you do so, yes, well done – the meaning is exactly we want to achieve here. According to Magnus Larsson on his article about Microservices:
Composite services Composite services can either orchestrate a number of core services to perform a common task or aggregating information from a number of core services.
Said that, in our example, the purpose to create a composite is just to leave the card and statement module a little bit more independent, it is, each one take care just its own concerns.
One more project is required:
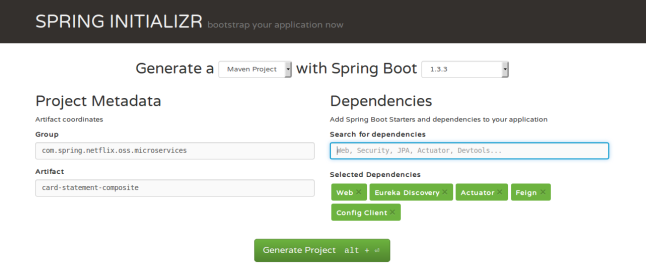
Generate a: Maven Project
Spring Boot: 1.3.3
Group: com.spring.netflix.oss.microservices
Artifact: card-statement-composite
Dependencies:
Actuator, Web, Config Client, Eureka Discovery and Feign
Feign is the only Spring / Netflix tool new here, its function is to transform what we would do via httpClient or RestTemplate in a easier task. From its website:
How does Feign work?
Feign works by processing annotations into a templatized request. Just before sending it off, arguments are applied to these templates in a straightforward fashion. While this limits Feign to only supporting text-based apis, it dramatically simplified system aspects such as replaying requests. It is also stupid easy to unit test your conversions knowing this.
As soon as we start to write our code, we are going to see about it.
By now, this couple of things that we are doing at this stage kind of automatically.
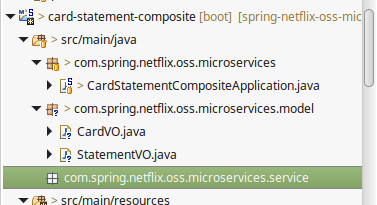
Import into your IDE.
Edit the class CardStatementCompositeApplication adding @EnableEurekaClient. But that is not all for here, we need also to add @EnableFeignClients. The final class will be:
package com.spring.netflix.oss.microservices;

import org.springframework.boot.SpringApplication;
import org.springframework.boot.autoconfigure.SpringBootApplication;
import org.springframework.cloud.netflix.eureka.EnableEurekaClient;
import org.springframework.cloud.netflix.feign.EnableFeignClients;

@SpringBootApplication
@EnableEurekaClient
@EnableFeignClients
public class CardStatementCompositeApplication {

	public static void main(String[] args) {
		SpringApplication.run(CardStatementCompositeApplication.class, args);
	}
}
Inside src/main/resources delete all folders and files and recreate a new one called bootstrap.yml, with content equals:
spring:
  application:
    name: card-statement-composite
  cloud:
    config:
      uri: http://localhost:9090
One more setup step – inside our microservice-config/MASTER, we’ll create a file named card-statement-composite.yml, the content:
server:
port: 0

eureka:
client:
serviceUrl:
defaultZone: http://localhost:8761/eureka/
Now, the code that really uses Feign client and that “compound” our separate modules in something that makes sense.

In which we’ll create 2 different classes – CardVO and StatementVO, respectively:
CardVO
package com.spring.netflix.oss.microservices.model;

import com.fasterxml.jackson.annotation.JsonIgnoreProperties;

@JsonIgnoreProperties(ignoreUnknown=true)
public class CardVO {

	private Long id;
	private String cardHolderName;
	private String pan;
	private String validDate;
	public Long getId() {
		return id;
	}
	public void setId(Long id) {
		this.id = id;
	}
	public String getCardHolderName() {
		return cardHolderName;
	}
	public void setCardHolderName(String cardHolderName) {
		this.cardHolderName = cardHolderName;
	}
	public String getPan() {
		return pan;
	}
	public void setPan(String pan) {
		this.pan = pan;
	}
	public String getValidDate() {
		return validDate;
	}
	public void setValidDate(String validDate) {
		this.validDate = validDate;
	}
	@Override
	public String toString() {
		return "CardVO [id=" + id + ", cardHolderName=" + cardHolderName + ", pan=" + pan + ", validDate=" + validDate
				+ "]";
	}
}
StatamentVO
package com.spring.netflix.oss.microservices.model;

import com.fasterxml.jackson.annotation.JsonIgnoreProperties;

@JsonIgnoreProperties(ignoreUnknown=true)
public class StatementVO {
	private Long id;
	private Long cardId;
	private String operationDate;
	private String value;

	public Long getId() {
		return id;
	}
	public void setId(Long id) {
		this.id = id;
	}
	public Long getCardId() {
		return cardId;
	}
	public void setCardId(Long cardId) {
		this.cardId = cardId;
	}
	public String getOperationDate() {
		return operationDate;
	}
	public void setOperationDate(String operationDate) {
		this.operationDate = operationDate;
	}

	public String getValue() {
		return value;
	}
	public void setValue(String value) {
		this.value = value;
	}
	@Override
	public String toString() {
		return "StatementVO [id=" + id + ", cardId=" + cardId + ", operationDate=" + operationDate + ", value=" + value
				+ "]";
	}

}
Following: another package
Inside this, we are going to manage our services and Feign Client will do the magic to call the other modules for us. Lets create 4 different interfaces – the code will talk by itself and will be easy to comprehend what they meaning.
- CardService
package com.spring.netflix.oss.microservices.service;

import static org.springframework.web.bind.annotation.RequestMethod.GET;
import static org.springframework.web.bind.annotation.RequestMethod.POST;

import java.util.List;

import org.springframework.http.MediaType;
import org.springframework.web.bind.annotation.PathVariable;
import org.springframework.web.bind.annotation.RequestBody;
import org.springframework.web.bind.annotation.RequestMapping;

import com.spring.netflix.oss.microservices.model.CardVO;

public interface CardService {
	final static String PREFIX = "api/";

	@RequestMapping(value = PREFIX + "cards", method = GET)
	List<CardVO> getCards();

	@RequestMapping(value = PREFIX + "card/{cardId}", method = GET)
	CardVO getCard(@PathVariable("cardId") Long cardId);

	@RequestMapping(value= PREFIX + "new-card", method = POST, produces = MediaType.APPLICATION_JSON_VALUE, consumes = MediaType.APPLICATION_JSON_VALUE) //it could be PUT
	void createCard(@RequestBody CardVO card);

}
- CardClient
package com.spring.netflix.oss.microservices.service;

import org.springframework.cloud.netflix.feign.FeignClient;

@FeignClient(name = "card-service")
public interface CardClient extends CardService{

}
- StatementService
package com.spring.netflix.oss.microservices.service;

import static org.springframework.web.bind.annotation.RequestMethod.GET;

import java.util.List;

import org.springframework.web.bind.annotation.PathVariable;
import org.springframework.web.bind.annotation.RequestMapping;
import org.springframework.web.bind.annotation.RequestParam;

import com.spring.netflix.oss.microservices.model.StatementVO;

public interface StatementService {

final static String PREFIX = "api/";

	@RequestMapping(value = PREFIX + "statements", method = GET)
	List<StatementVO> getStatements();

	@RequestMapping(value = PREFIX + "statement/{statementId}", method = GET)
	StatementVO getStatament(@PathVariable("statementId") Long statementId);

	@RequestMapping(value= PREFIX + "statement", method = GET)
	List<StatementVO> getStatements(@RequestParam("cardId") Long cardId);

}
- StatementClient
package com.spring.netflix.oss.microservices.service;

import org.springframework.cloud.netflix.feign.FeignClient;

@FeignClient(name = "statement-service")
public interface StatementClient extends StatementService{

}
As you saw, we are preparing to consume our API that we designed for Card and Statement. At this point, is very important to pay attention to exposed names (once the module has to match with Feign), attributes, path variables and every detail. Be sure that all is correct, otherwise you’ll have a headache to find the problem – it is a personal opinion, but I think that is annoying to find a error detail in a vast API.
Well, once the Feign clients are create, lets make use of them. Now, one class in the same package – CardStatementServiceController.java, the code:
package com.spring.netflix.oss.microservices.service;

import java.util.HashMap;
import java.util.List;
import java.util.Map;

import org.springframework.beans.factory.annotation.Autowired;
import org.springframework.http.HttpStatus;
import org.springframework.http.ResponseEntity;
import org.springframework.web.bind.annotation.RequestMapping;
import org.springframework.web.bind.annotation.RequestMethod;
import org.springframework.web.bind.annotation.RequestParam;
import org.springframework.web.bind.annotation.RestController;

import com.spring.netflix.oss.microservices.model.CardVO;
import com.spring.netflix.oss.microservices.model.StatementVO;

@RestController
@RequestMapping("/api")
public class CardStatementServiceController {

	@Autowired
	CardClient cardClient;

	@Autowired
	StatementClient statementClient;

	@RequestMapping(value="/statement-by-card", method=RequestMethod.GET)
	public ResponseEntity<Map<CardVO, List<StatementVO>>>
	getStatementByCardId(@RequestParam Long cardId){
		Map<CardVO, List<StatementVO>> response = new HashMap<>();

		response.put(cardClient.getCard(cardId), statementClient.getStatements(cardId));

		return new ResponseEntity<Map<CardVO,List<StatementVO>>>(response, HttpStatus.OK);
	}
}
Repair that we just injected our clients here and, from them, we are invoking our service without many worries. By the way, in new versions of Feign we have possibility to define a fallback method case our clients failed. We won’t do it now because this tutorial is getting very big.
The last thing, I promise. We transformed our Edge-Server in a reverse proxy, so, as aforementioned, it is required to edit edge-server.yml to create our rotes. At the end of the day, this file must be exactly this:
server:
  port: 8765

eureka:
  client:
    serviceUrl:
      defaultZone: http://localhost:8761/eureka/

zuul:
  debug:
    request: true
  routes:
    card-service:
        path: /card-service/**
        serviceId: card-service
        stripPrefix: true
    statement-service:
        path: /statement-service/**
        serviceId: statement-service
        stripPrefix: true
    card-statement-composite:
        path: /card-statement-composite/**
        serviceId: card-statement-composite
        stripPrefix: true
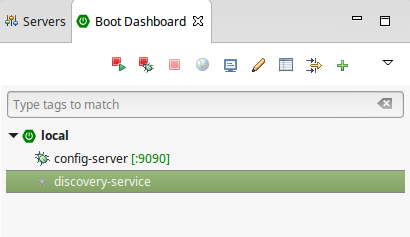
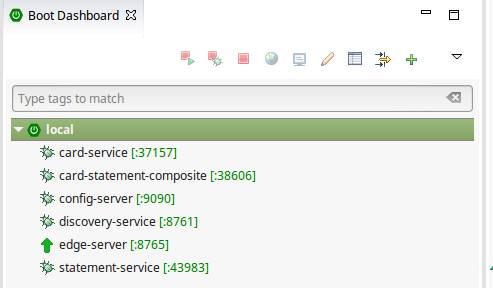
Don’t forget to commit your configuration, push it to remote and later start the server in this sequence:
- Config-Server
- Discovery-Service
- {Edge-Server, Card-Service, Statement-Server and Card-Statement-Composite}
See that where we left without a port defined, the Spring set a random for us and the discovery is in charge, lets say, to discovery it. :O
To access and see the results, all that we must to do is:
http://localhost:8765/card-statement-composite/api/statement-by-card?cardId=4
Now we hit the Edge-Server, it does the proxy for us. On the other hand, Feign client present on card-statement-composite is invoking the card-service and statement-service.
Our pretty basic expected result is showed below.
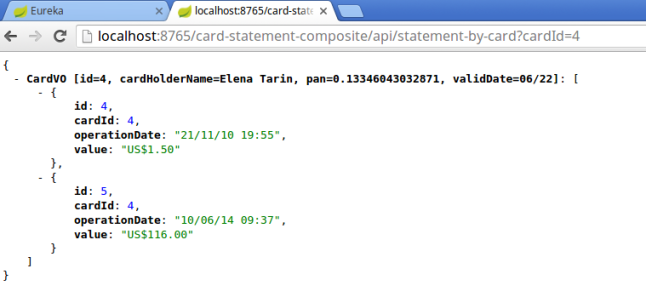
Well, we did much work by today, see you in our next blog post.