Before we start
Hello everyone, first of all, for those that eventually are following the serie, sorry about this huge delay between one post and another, I will avoid this from now on. However, if you hit this page without following the Step-by-step into Micro-Services Architecture with Spring and Netflix OSS, it can be useful to know about the serie:
- Part 1: The purpose of the series – MSA Step by step
- Part 2: Config-Server and Discovery Service
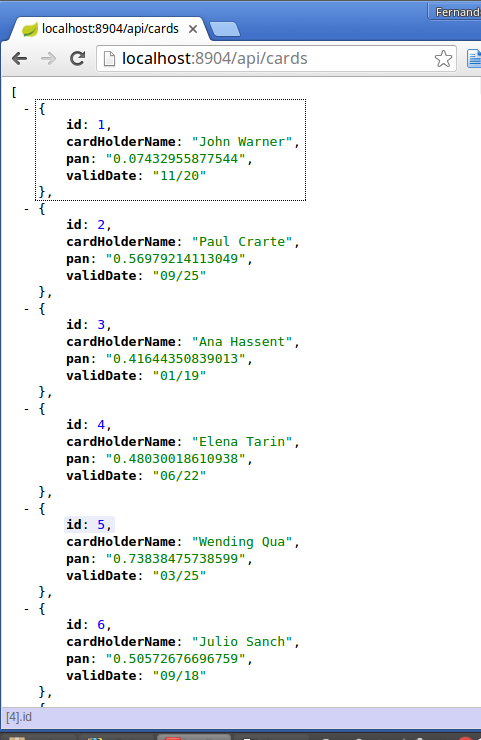
- Part 3: Edge Server: Netflix Zuul
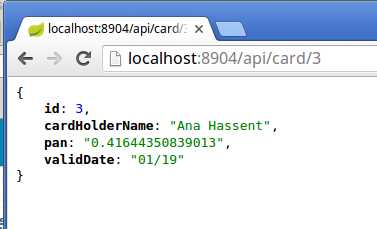
- Part 4.1: Core Business – Card Service
- Part 4.2 & 4.3: Core Business – Statement Service and CardStatementComposite
Our subject today is one of the most awesome that we’ll talk about in the serie and it demands pretty basic coding – nevertheless, the results are pretty visuals, very useful and helps us to build a resilient, feasible and reliable system.
Circuit Breaking
Well, you can be one of those guys that are always suspicious, lets say, do you always smell a rat with this “thing” of various microservices running separate and wondering about a tragic scenario?
If your answer to this question is “No, I’m not this guy.” I’d like to suggest that you should reconsider: we know that sometimes bad things just happen and the consequences can be irrecoverable (from lose money, loss of confidence or depending on the scope of your system, why not say – causing injury to people).
Thinking about it, our friend’s blog, Magnus Larsson stated some interesting phrase about chain of failures:
A chain of failures, where an error in one component can cause errors to occur in other components that depend on the failing component. This needs special attention in a microservice based system landscape where, potentially a large number of, separately deployed microservices communicate with each other. One common solution to this problem is to apply a circuit breaker pattern.
Given this, to know more about Circuit Breaker pattern, it is valid to listen from someone well-known inside Computer Science community – for me Martin Fowler has the credibility need to talk about all subjects 😀 – see here what he said on his blog:
The basic idea behind the circuit breaker is very simple. You wrap a protected function call in a circuit breaker object, which monitors for failures. Once the failures reach a certain threshold, the circuit breaker trips, and all further calls to the circuit breaker return with an error, without the protected call being made at all. Usually you’ll also want some kind of monitor alert if the circuit breaker trips.
Hystrix / Monitor Dashboard and Turbine
With these substantial foundations, the Netflix team created Hystrix a latency and fault tolerance library designed to isolate points of access to remote systems, services and 3rd party libraries, stop cascading failure and enable resilience in complex distributed systems where failure is inevitable.

The funny part is that the configuration / code demanded to make it works is very simple, we are going to see in a minute.
To finalize the theoretical part, as HystrixCommands and HystrixObservableCommands execute they generate metrics on execution outcomes and latency. These are very useful to operators of the system, as they give a great deal of insight into how the system is behaving. Hystrix offers metrics per command key and to very fine granularities (on the order of seconds). Exposed this, we will also be able to make use of these outcomes from Hystrix to enhance our tool set and extract profitable information of them. To do so, we will aggregate these metrics individually on a stream and show through a dashboard – here enter both: Monitor Dashboard and Turbine. We’ll get there, don’t worry. Monitor + Turbine:
Hands on
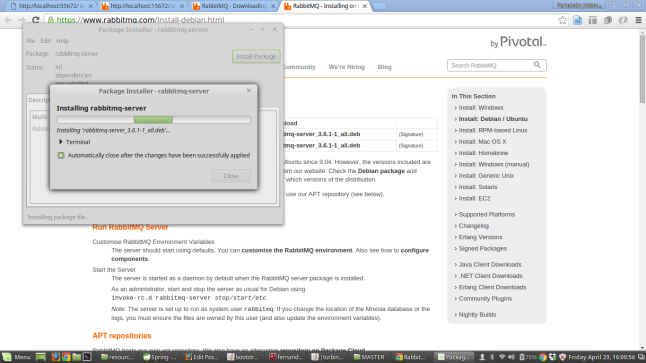
Access https://www.rabbitmq.com/download.html and download the corresponding version according to your system:
Once you have downloaded and installed, run something like: sudo rabbitmqctl status
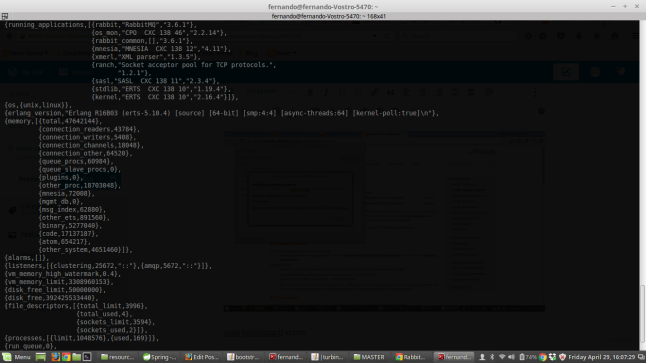
You can use rabbitmqctl status to verify whether a broker is running.
Now, we need to enable a specific feature of Rabbit: the rabbitmq-management plugin, that provides an HTTP-based API for management and monitoring of your RabbitMQ server, along with a browser-based UI and a command line tool, rabbitmqadmin. Features include:
- Declare, list and delete exchanges, queues, bindings, users, virtual hosts and permissions.
- Monitor queue length, message rates globally and per channel, data rates per connection, etc.
- Send and receive messages.
- Monitor Erlang processes, file descriptors, memory use.
- Export / import object definitions to JSON.
- Force close connections, purge queues.
Here the commands to enable the plugin management:
fernando@fernando-Vostro-5470:~$ sudo rabbitmq-plugins enable rabbitmq_management
The following plugins have been enabled:
mochiweb
webmachine
rabbitmq_web_dispatch
amqp_client
rabbitmq_management_agent
rabbitmq_management

Applying plugin configuration to rabbit@fernando-Vostro-5470... started 6 plugins.
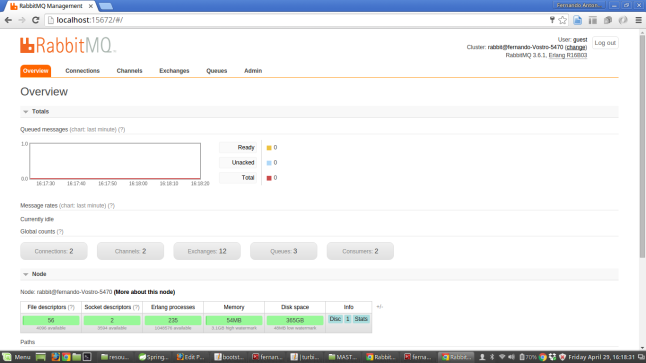
After it is done, you can access: http://localhost:15672/ with user and pass: guest.
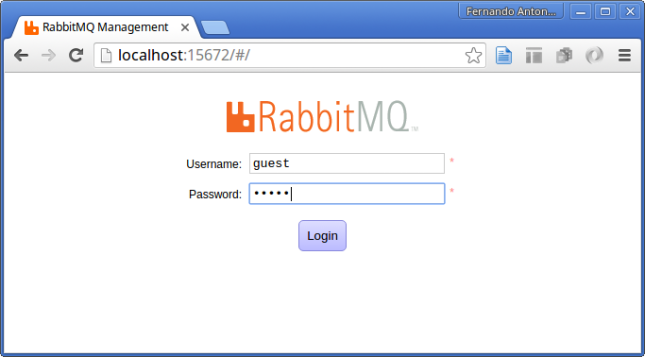
The console admin for RabbitMQ seems like this:
Obviously, in some moment you’ll have to restart your machine and don’t forget to run rabbitmq-server in case it is not set to start by default.
fernando@fernando-Vostro-5470:~$ sudo rabbitmq-server

RabbitMQ 3.6.1. Copyright (C) 2007-2016 Pivotal Software, Inc.
##  ##      Licensed under the MPL.  See http://www.rabbitmq.com/
##  ##
##########  Logs: /var/log/rabbitmq/rabbit@fernando-Vostro-5470.log
######  ##        /var/log/rabbitmq/rabbit@fernando-Vostro-5470-sasl.log
##########
Starting broker... completed with 6 plugins.
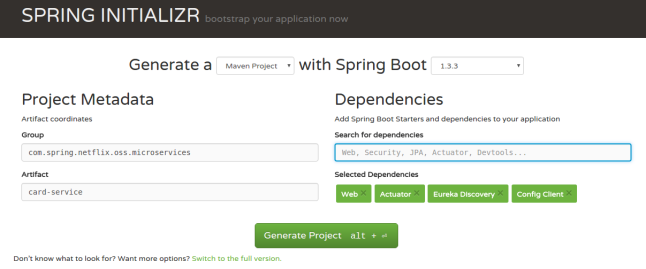
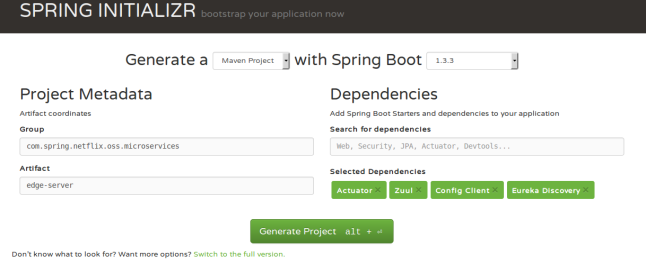
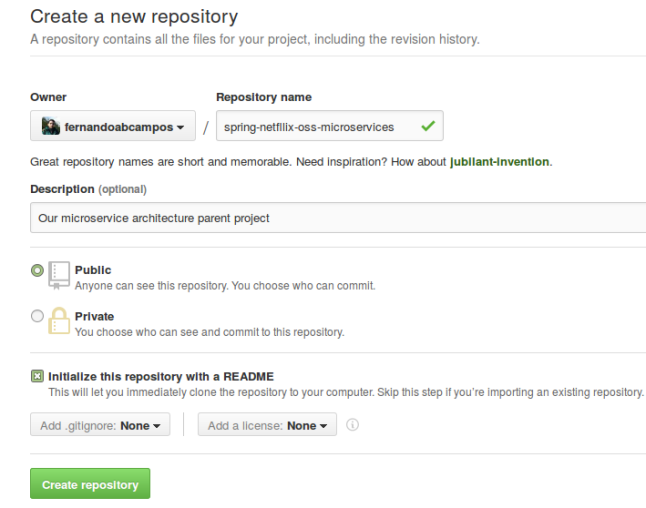
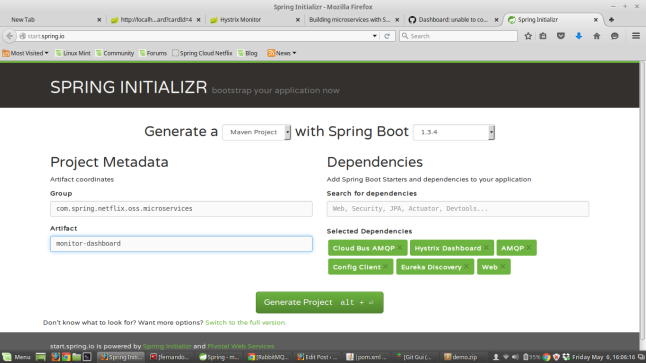
Now, lets focus on what interest to us, our Monitor Dashboard. For so, access http://start.spring.io and create a new project with the following configurations:
Create a new project:
Generate a: Maven Project
Spring Boot: 1.3.4
Group: com.spring.netflix.oss.microservices
Artifact: monitor-dashboard
Dependencies:
Cloud Bus AMQP, Hystrix Dashboard, AMQP, Config Client, Eureka Discovery, Web.
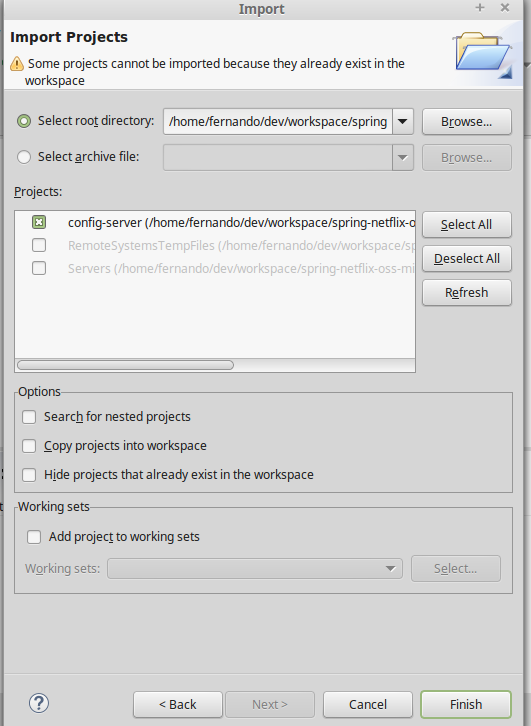
Later import the project into your IDE and as always we’ll edit the MonitorDashboardApplication.java reaching to enable a @EnableHystrixDashboard:
package com.spring.netflix.oss.microservices;

import org.springframework.boot.SpringApplication;
import org.springframework.boot.autoconfigure.SpringBootApplication;
import org.springframework.cloud.client.discovery.EnableDiscoveryClient;
import org.springframework.cloud.netflix.hystrix.dashboard.EnableHystrixDashboard;
import org.springframework.stereotype.Controller;
import org.springframework.web.bind.annotation.RequestMapping;

@SpringBootApplication
@EnableHystrixDashboard
@EnableDiscoveryClient
@Controller
public class MonitorDashboardApplication {

	public static void main(String[] args) {
		SpringApplication.run(MonitorDashboardApplication.class, args);
	}

	@RequestMapping("/")
	public String home() {
		return "forward:/hystrix";
	}
}
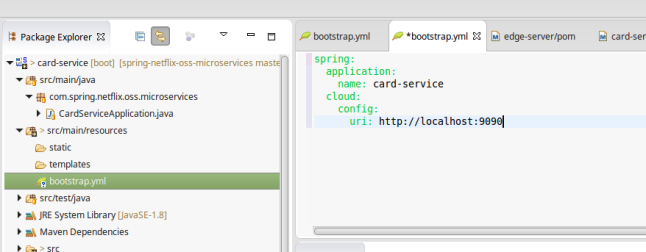
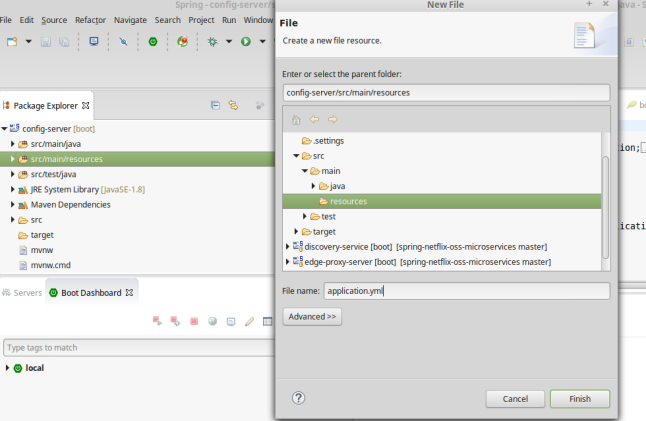
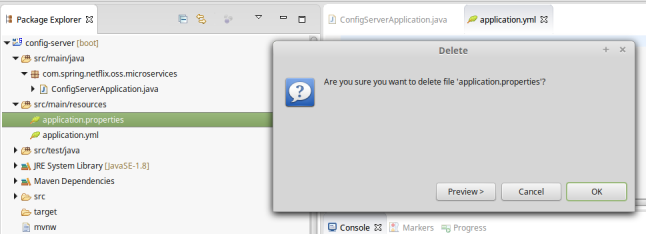
As always, delete the src/main/resources/application.properties and recreate it in a new fashion way: bootstrap.yml with the following content:
spring:
  application:
    name: monitor-dashboard
  cloud:
    config:
      uri: http://localhost:9090
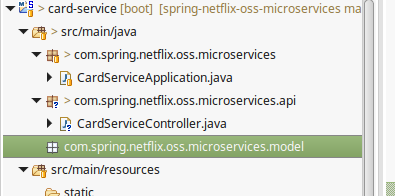
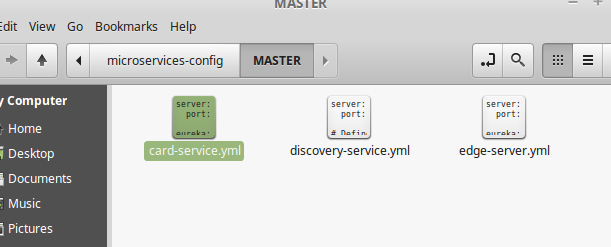
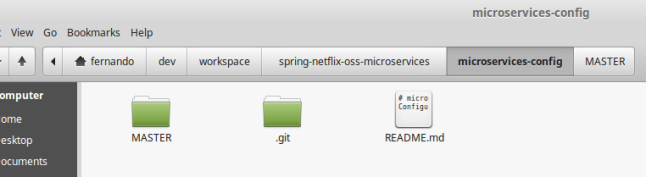
This file is to say that our config will be managed by a config-server and we need to create a config-server/monitor-dashboard.yml in the specific project, i.e. microservices-config/MASTER/monitor-dashboard.yml. The result:

And the content of this file:
server:
  port: 8179
Simple, don’t you agree? For now, this part is done.
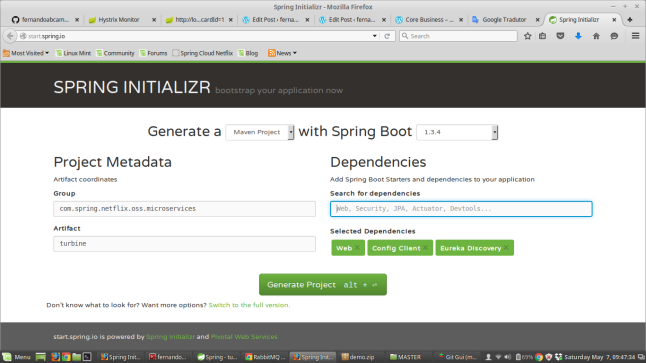
Newly, we talked about Turbine – it is our next module to build. Again we return to http://start.spring.io and set up a new project:
Generate a: Maven Project
Spring Boot: 1.3.4
Group: com.spring.netflix.oss.microservices
Artifact: turbine
Dependencies:
Config Client, Eureka Discovery, Web.
Note: Later will be necessary to edit the pom.xml manually adding new dependencies.
As soon as the project is generated and properly imported into IDE, open the pom.xml to add the needed dependencies. By the end, this pom will have the following structure:
<?xml version="1.0" encoding="UTF-8"?>
<project xmlns="http://maven.apache.org/POM/4.0.0" xmlns:xsi="http://www.w3.org/2001/XMLSchema-instance"
	xsi:schemaLocation="http://maven.apache.org/POM/4.0.0 http://maven.apache.org/xsd/maven-4.0.0.xsd">
	<modelVersion>4.0.0</modelVersion>

	<groupId>com.spring.netflix.oss.microservices</groupId>
	<artifactId>turbine</artifactId>
	<version>0.0.1-SNAPSHOT</version>
	<packaging>jar</packaging>

	<name>turbine</name>
	<description>Hystrix Dasboard</description>

	<parent>
		<groupId>org.springframework.boot</groupId>
		<artifactId>spring-boot-starter-parent</artifactId>
		<version>1.3.3.RELEASE</version>
		<relativePath/> <!-- lookup parent from repository -->
	</parent>

	<properties>
		<project.build.sourceEncoding>UTF-8</project.build.sourceEncoding>
		<java.version>1.8</java.version>
	</properties>

	<dependencies>
		<dependency>
			<groupId>org.springframework.boot</groupId>
			<artifactId>spring-boot-starter-web</artifactId>

			<exclusions>
		        <exclusion>
		            <groupId>org.springframework.boot</groupId>
		            <artifactId>spring-boot-starter-tomcat</artifactId>
		        </exclusion>
		    </exclusions>
		</dependency>
		<dependency>
			<groupId>org.springframework.boot</groupId>
			<artifactId>spring-boot-starter-undertow</artifactId>
		</dependency>
		<dependency>
			<groupId>org.springframework.cloud</groupId>
			<artifactId>spring-cloud-netflix-turbine-amqp</artifactId>
			<version>1.0.7.RELEASE</version>
		</dependency>

		<dependency>
			<groupId>org.springframework.cloud</groupId>
			<artifactId>spring-cloud-starter-eureka</artifactId>
		</dependency>
		<dependency>
			<groupId>org.springframework.cloud</groupId>
			<artifactId>spring-cloud-starter-config</artifactId>
		</dependency>
		<dependency>
			<groupId>org.springframework.boot</groupId>
			<artifactId>spring-boot-starter-test</artifactId>
			<scope>test</scope>
		</dependency>
	</dependencies>

	<dependencyManagement>
		<dependencies>
			<dependency>
				<groupId>org.springframework.cloud</groupId>
				<artifactId>spring-cloud-dependencies</artifactId>
				<version>Brixton.BUILD-SNAPSHOT</version>
				<type>pom</type>
				<scope>import</scope>
			</dependency>
		</dependencies>
	</dependencyManagement>

	<build>
		<plugins>
			<plugin>
				<groupId>org.springframework.boot</groupId>
				<artifactId>spring-boot-maven-plugin</artifactId>
			</plugin>
		</plugins>
	</build>

	<repositories>
		<repository>
			<id>spring-snapshots</id>
			<name>Spring Snapshots</name>
			<url>https://repo.spring.io/snapshot</url>
			<snapshots>
				<enabled>true</enabled>
			</snapshots>
		</repository>
		<repository>
			<id>spring-milestones</id>
			<name>Spring Milestones</name>
			<url>https://repo.spring.io/milestone</url>
			<snapshots>
				<enabled>false</enabled>
			</snapshots>
		</repository>
	</repositories>

</project>
Our main class also need adjusts to include :
package com.spring.netflix.oss.microservices;

import org.springframework.boot.autoconfigure.SpringBootApplication;
import org.springframework.boot.builder.SpringApplicationBuilder;
import org.springframework.cloud.netflix.eureka.EnableEurekaClient;
import org.springframework.cloud.netflix.turbine.amqp.EnableTurbineAmqp;

@SpringBootApplication
@EnableTurbineAmqp
@EnableEurekaClient
public class TurbineApplication {

	public static void main(String[] args) {
		new SpringApplicationBuilder(TurbineApplication.class).run(args);
	}
}
Likewise the other modules, the configuration will look at config-server to obtain the ports, etc. To do so, remove the src/main/resources/application.properties and recreate it in a new fashion way: bootstrap.yml with the following content:
spring:
  application:
    name: turbine
  cloud:
    config:
      uri: http://localhost:9090
We need to create a microservices-config/MASTER/turbine.yml file. The content:
server:
  port: 0
turbine:
  amqp:
    port: 8989
Our example is almost complete now. However, any of this would make sense if we don’t have annotations with @HystrixCommand in our methods that must be protected against fails, that annotation will be our wizard that will enhance us with the possibility to extract information about the health of our services, i.e. whether our circuit is open or not, and also provide a fallback method.
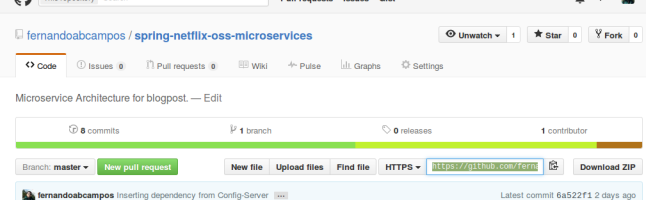
The changes now will be done in our composite service that we created some posts ago. First of all, we’ll add some dependencies in our pom.xml, basically spring-cloud-starter-bus-amqp, spring-cloud-netflix-hystrix-amqp and spring-cloud-starter-hystrix. Instead of adding the full pom.xml here, if you need help to adequate yours, please, just access and copy this one: https://github.com/fernandoabcampos/spring-netflix-oss-microservices/blob/master/card-statement-composite/pom.xml
Once the dependencies are updated, we can edit CardStatementServiceController.java to add the annotation @HystrixCommand(fallbackMethod = “defaultCardStatementError”) and obviously, create this fallback method. The final result:
package com.spring.netflix.oss.microservices.service;

import java.util.HashMap;
import java.util.List;
import java.util.Map;

import org.springframework.beans.factory.annotation.Autowired;
import org.springframework.http.HttpStatus;
import org.springframework.http.ResponseEntity;
import org.springframework.web.bind.annotation.RequestMapping;
import org.springframework.web.bind.annotation.RequestMethod;
import org.springframework.web.bind.annotation.RequestParam;
import org.springframework.web.bind.annotation.RestController;

import com.netflix.hystrix.contrib.javanica.annotation.HystrixCommand;
import com.spring.netflix.oss.microservices.model.CardVO;
import com.spring.netflix.oss.microservices.model.StatementVO;

@RestController
@RequestMapping("/api")
public class CardStatementServiceController {

	@Autowired
	CardClient cardClient;

	@Autowired
	StatementClient statementClient;

	@HystrixCommand(fallbackMethod = "defaultCardStatementError")
	@RequestMapping(value="/statement-by-card", method=RequestMethod.GET)
	public ResponseEntity<Map<CardVO, List<StatementVO>>>
	getStatementByCardId(@RequestParam Long cardId){
		Map<CardVO, List<StatementVO>> response = new HashMap<>();

		response.put(cardClient.getCard(cardId), statementClient.getStatements(cardId));

		return new ResponseEntity<Map<CardVO,List<StatementVO>>>(response, HttpStatus.OK);
	}

	public ResponseEntity<Map<CardVO, List<StatementVO>>>
	defaultCardStatementError(Long cardId){
		Map<CardVO, List<StatementVO>> response = new HashMap<>();
		return new ResponseEntity<Map<CardVO,List<StatementVO>>>(response, HttpStatus.OK);

	}
}
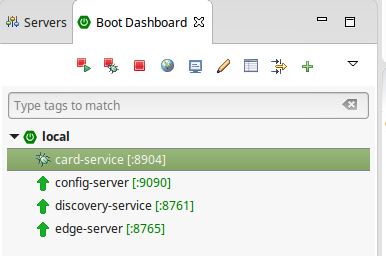
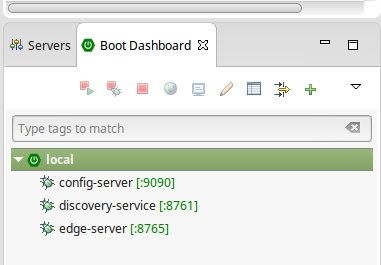
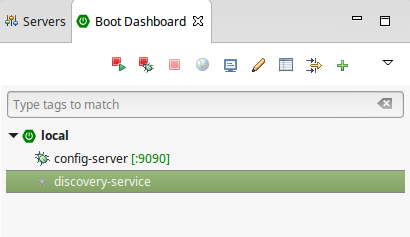
Well, it is all. Please, commit your configuration, push it to remote and later start the server in this sequence:
- Config-Server
- Discovery-Service
- {Edge-Server, Card-Service, Statement-Server, Card-Statement-Composite, Monitor-Dashboard and Turbine}
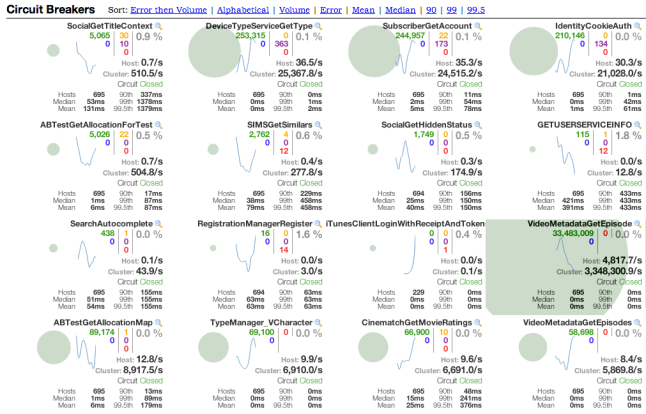
As soon as all is started, access: http://localhost:8179 just to see the main page of Hystrix Dashboard – the expected result is: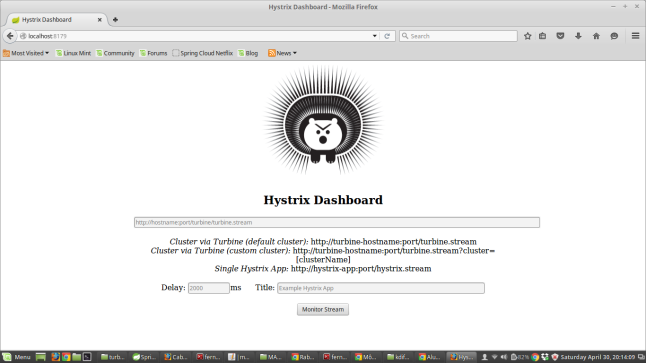 Then, provide a turbine stream (http://localhost:8989/turbine.stream) and click at “Monitor Stream”. Probably the Hystrix Dashboard will open another screen with some message like “Loading”. In another tab, invoke some calls against the controller that we enable Hystrix, for example: http://localhost:8765/card-statement-composite/api/statement-by-card?cardId=1 – press F5 some times just to force more than one call. It must result in:
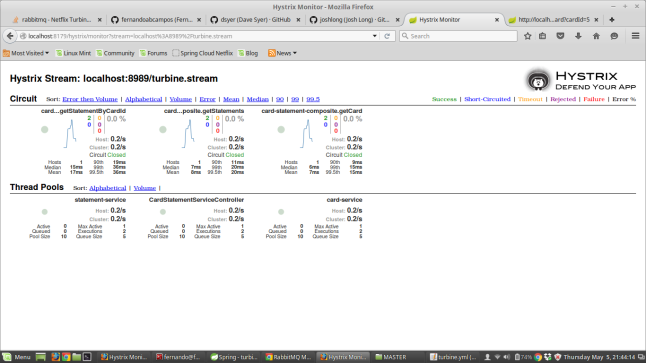
Realize that all the circuits is closed (the system is answering well).
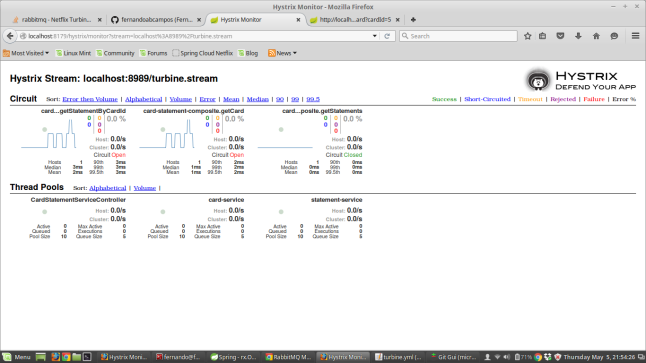
Now, to simulate an error, stop a service (as card-service) and continue doing subsequent calls to http://localhost:8765/card-statement-composite/api/statement-by-card?cardId=1. After some seconds, it will happen:
With this, we achieved our goal for now. Obviously, in a real world environment, we will create a fallback method more adequate than one that just return an empty list of records, however, the goal was to demonstrate how this pieces work together.
Thank you guys, see you in our next blog post.